Skinning Deer by Hand
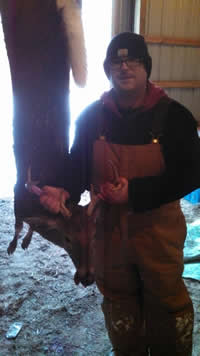
I’m sure that you’re all familiar with the old adage “There’s more than one way to skin a cat.” Well let me tell
you, there are COUNTLESS ways of skinning a deer. Some guys will hang a deer from the neck, make three incisions, and using a golf ball and winch, they will skin a deer in a matter of minutes.
The deer skinning method I demonstrate in this article is the way my grandfather taught my father, the way my father taught me, and the way I taught my son.
In my humble opinion, the way I approach skinning deer is the most practical way to skin and process. Whether you are working in your garage with the deer hanging from the rafters or hanging your deer from a tree limb in the woods, this is an easy technique that requires no special equipment.
Processing Deer Post SHTF
So, you have harvested a deer to feed your family, now what? Before SHTF you may have just field dressed it and taken it to your local butcher shop with the hide on it, and four days later picked up neatly cut and shrink-wrapped packages of venison.
Post SHTF you don’t have access to the butcher, so what now? Where do you start? For demonstration purposes I am using a block and tackle in my pole barn, but in the field you can use 550 paracord looped over a large tree limb for skinning deer.
Hanging the Deer for Skinning
First things first, on the hind quarters of the deer you will see tendons, and for all intents and purposes these tendons are going to be your “ weight bearing” point for hanging the animal to skin. Make an incision between the rear tendons and the leg bone (BE CAREFUL NOT TO CUT TENDONS). Run your 550 paracord through this incision on each hindquarter and tie it off.
Next, throw the cord over a branch that is large enough to hold the weight of the deer. Pull on the cord to hoist the deer off the ground then tie it off.
The Skinning Process
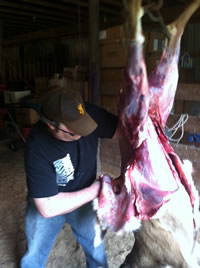
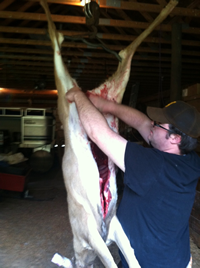
At this point we can begin the actual skinning process. I like to start at the Y of the deer (where the hind quarters meet) and run my knife under the hide up the inside of the hind quarters. Doing this gives you a flap of hide to hold while skinning.
After you have split the hide up the inside of the hindquarter, hold the flap of hide in your non-dominant hand while holding the knife in your dominant hand. Pull back from the hindquarter while using the tip of your knife to cut hide away from the meat. At this time you are going to use small knife strokes, being careful not to cut the actual hide, but trimming the connective tissue that is in between the hide and meat.
Skinning the Deer’s Hindquarters
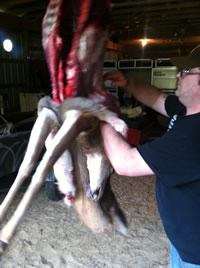
You can use this same technique to skin around the hindquarters and to the tail of the animal. This part of the process can be a little tricky. I work around underneath, where the base of the tail meets the deer’s body, using the same technique as before.
Skinning the hide back from the meat, if done correctly, means there will be a gap to slide your hand between the tail (with the hide on it) and the body of the deer. Taking your non-dominant hand and holding the base of the tail as close to the deer’s body as you can, take your dominant hand and grip the gap of hide just above your other hand and pull away from the deer, this will pull the hide off the tail.
Peeling the Deer Hide Away from Legs and Front Quarters
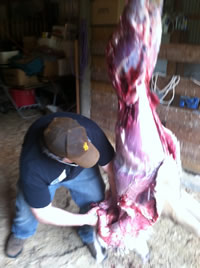
The next step, I think, is the easiest part of skinning deer. Take the hide in both hands, get a good tight grip and use your body weight to push down on the hide of the deer. The hide should easily peel away from the deer’s body. Using this pushing technique, peel the hide down to the shoulders, or front quarters of the deer.
After that, you are going to need to use a little muscle; bend the deer’s front leg at the knee joint (in its natural bending direction) and take your knife and run it across the joint, finding the area where there is a gap from bending. Cut into this gap at the front of the knee joint and then cut around the rest of the leg joint at this level.
With the leg still bent, force it to the right and then to the left (you will have to put muscle behind it) and you should hear the joint break. Work the joint in a 360 degree motion, then take the knife and work it
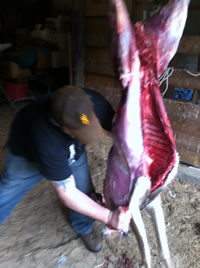
through the joint cutting the tendons and ligaments, thus separating the lower portion of the leg from the upper leg. Repeat this process on both front legs.
Take your knife and run it up the underside of the front legs, splitting the hide to the armpit area of the deer. Next using the knife technique that was employed for the hindquarters, separate the hide from the legs. Once the front legs are skinned you will be able to slide them through and underneath the hide that you have slid down the deer’s rib cage.
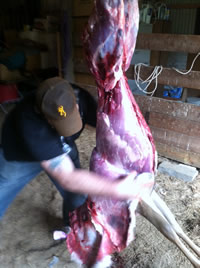
Removing the Hide from the Neck
Use the downward pushing method again to peel the hide down to the deer’s neck just below the head. Taking your knife, cut down through the neck meat until you hit the spine.
Removing the Deer Head
Using your blade, find the gap between the deer’s vertebrae and sever the spinal cord, thus removing the head of the animal.
After you have skinned the deer you may notice that there are loose hairs on the meat. The more you often
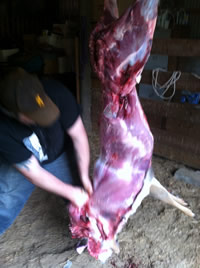
you skin, the less there will be. You can either rinse the hair off, or you can singe it off. Like everything, practice makes perfect when skinning deer.
At this point your deer is ready to hang and await processing. If the outside temperature is warm, you need to process it immediately. If the weather is cool enough that there are no flies, you can let it hang for a day or so.
What deer skinning technique do you like best? Let us know in the comments section!

Leave a Reply